Windows Client Setup → 日本語
Before setting up your windows client, please
check the printer status
from your web browser. If you can't check the status of the printer, the setup will most likely fail. In this case, please make sure that the printer is turned on
and the network configuration of your PC is correct (connected to RCNP's network)
- Check the hostname and model name of the printer.
- Get the most up-to-date printer driver.
- Download the up-to-date driver from the Fuji-Xerox site.
- Remember to download correct version for your Windows (64bit/32bit).
- Open the file you downloaded. Click "Yes" to agree the "License Agreement". If asked select where to extract the driver.

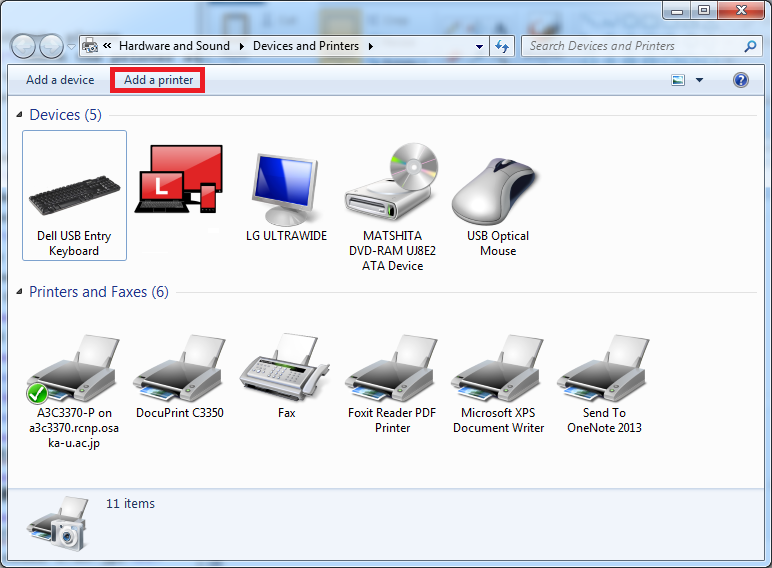
- Open start menu and click "Devices and printers".

- Click "Add a printer".
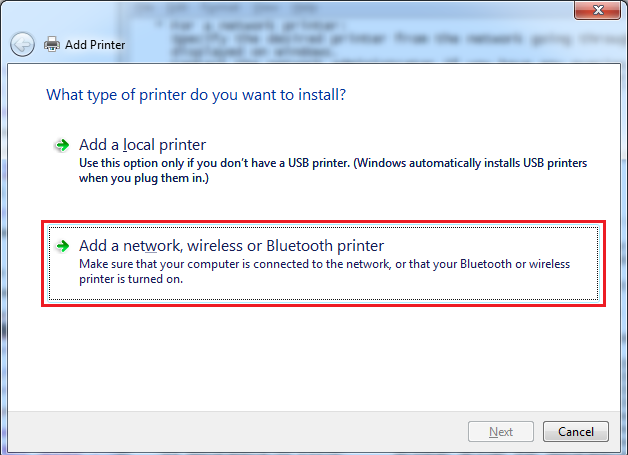
- Click "Add a network, wireless or Bluetooth printer".
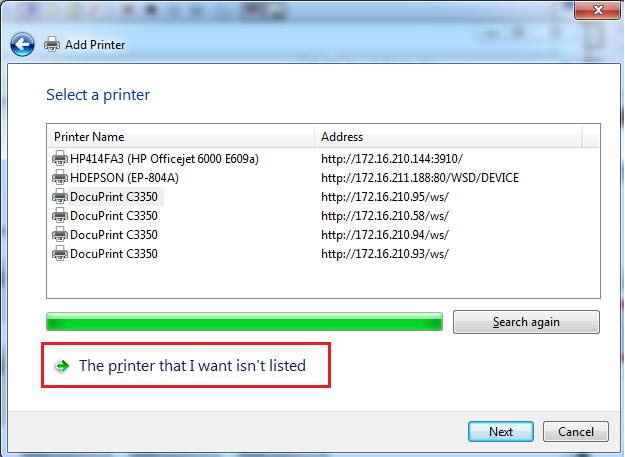
- Click "The printer that I want isn't listed".
- Select "Add a printer using a TCP/IP address or hostname".
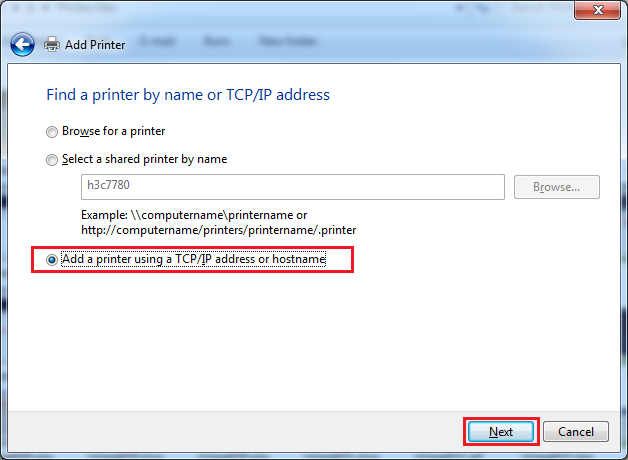
- Fill in following the notes below and click next.
- Select "TCP/IP Device" as Device type.
- In the "Hostname or IP address" field type the <name of the printer> + .rcnp.osaka-u.ac.jp
- Example: h3c7780 + .rcnp.osaka-u.ac.jp = h3c7780.rcnp.osaka-u.ac.jp
- Uncheck "Query the printer and automatically select the driver to use".
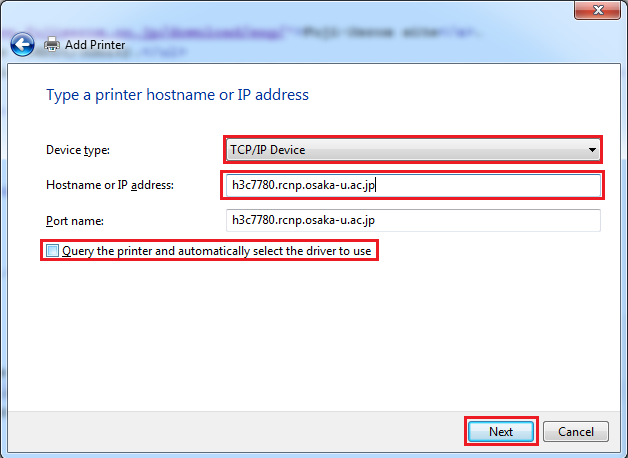
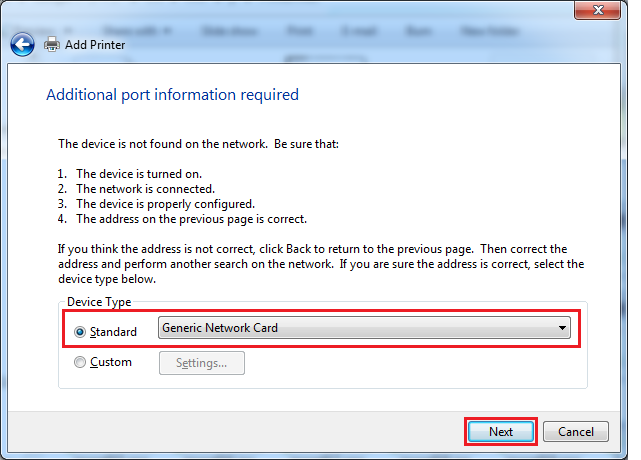
- Confirm "Standard" is checked and click next.
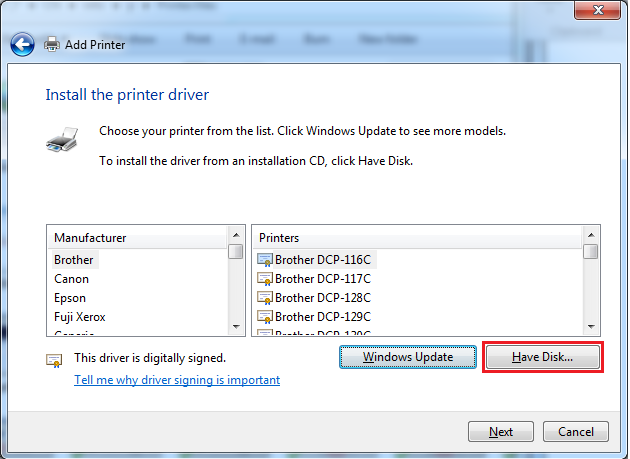
- Click "Have Disk..."
- Click "Browse..."
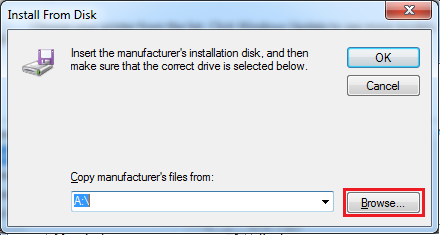
- Browse to the location you downloaded and extracted the driver. Navigate to the new folder that was created by the driver-executable.
There should be inf driver file inside the folder.
Select it and click "Open". (You might have to open one more folder called "English".)

- Click "Ok".
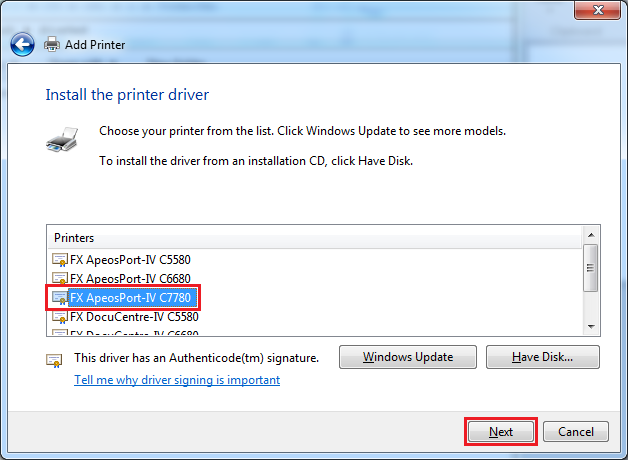
- Select driver for your printers model from the list and click "Next".
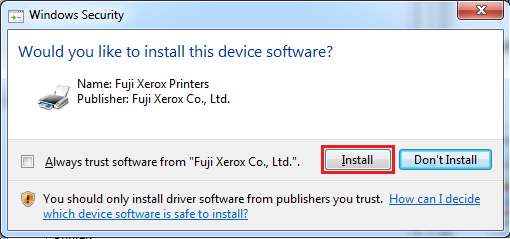
- If asked click "Install".
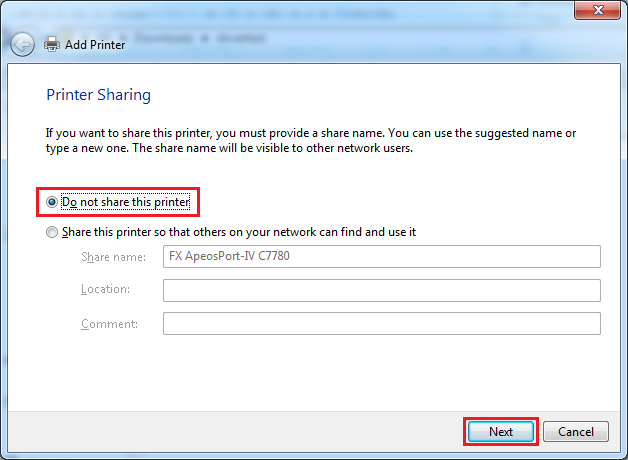
- Select "Do not share this printer" and click "Next".
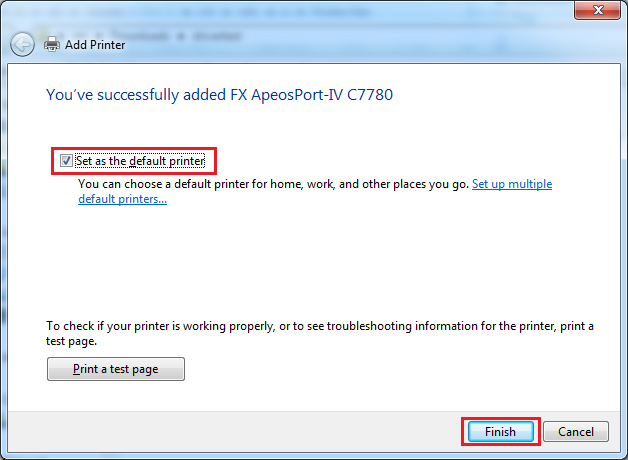
- If you want to set the printer as default printer confirm that "Set as the default printer" is checked and click "Finish".
Return to printers page
Return to CN top